Creating a new site
In Omeka you can have multiple sites, each configured with their own content, theme and configuration.
To get started creating a new site, click on the sites option in the Admin panel, and click "New site" in the top right. You will be prompted to add a name for your site, and the URL on which it will be available on your domain. This is all that is required to create your site, but there are some optional steps you can take too.
Configuring a theme
Beforing hitting the "Add" button in the top right, you can change the Theme of your site. This supports any of the Omeka default themes although Public User module may not expose logged in status on all themes.
After you have created your site, on the left hand site you will see your site, clicking on your site will show an expanded menu. If you click "Theme" you can again change your theme, and also edit the theme settings. These settings depend on the theme you have selected, but commonly this is where you can change the footer content or add a site logo.
Adding site content
There are 2 main pieces of content that you can associate with your site. Item sets or site pages. In our platform, IIIF Collections and Capture models are Item sets, so you will have to assign new collections and models that you create to your site using the "Site pool". To get started click on your site in the admin menu, on the left you will see navigation for "Resources" which you can click into.
In the UI there will be 2 tabs: "Item pool" and "Item sets". This allows you to configure which content is available on your site. If you click on "Item sets" you will see a UI to add collections and capture models to your site, ordered by who created them. You can also quickly search to find the content you want to add. Ensuring your collections have labels will make this process smoother.

Changing default site
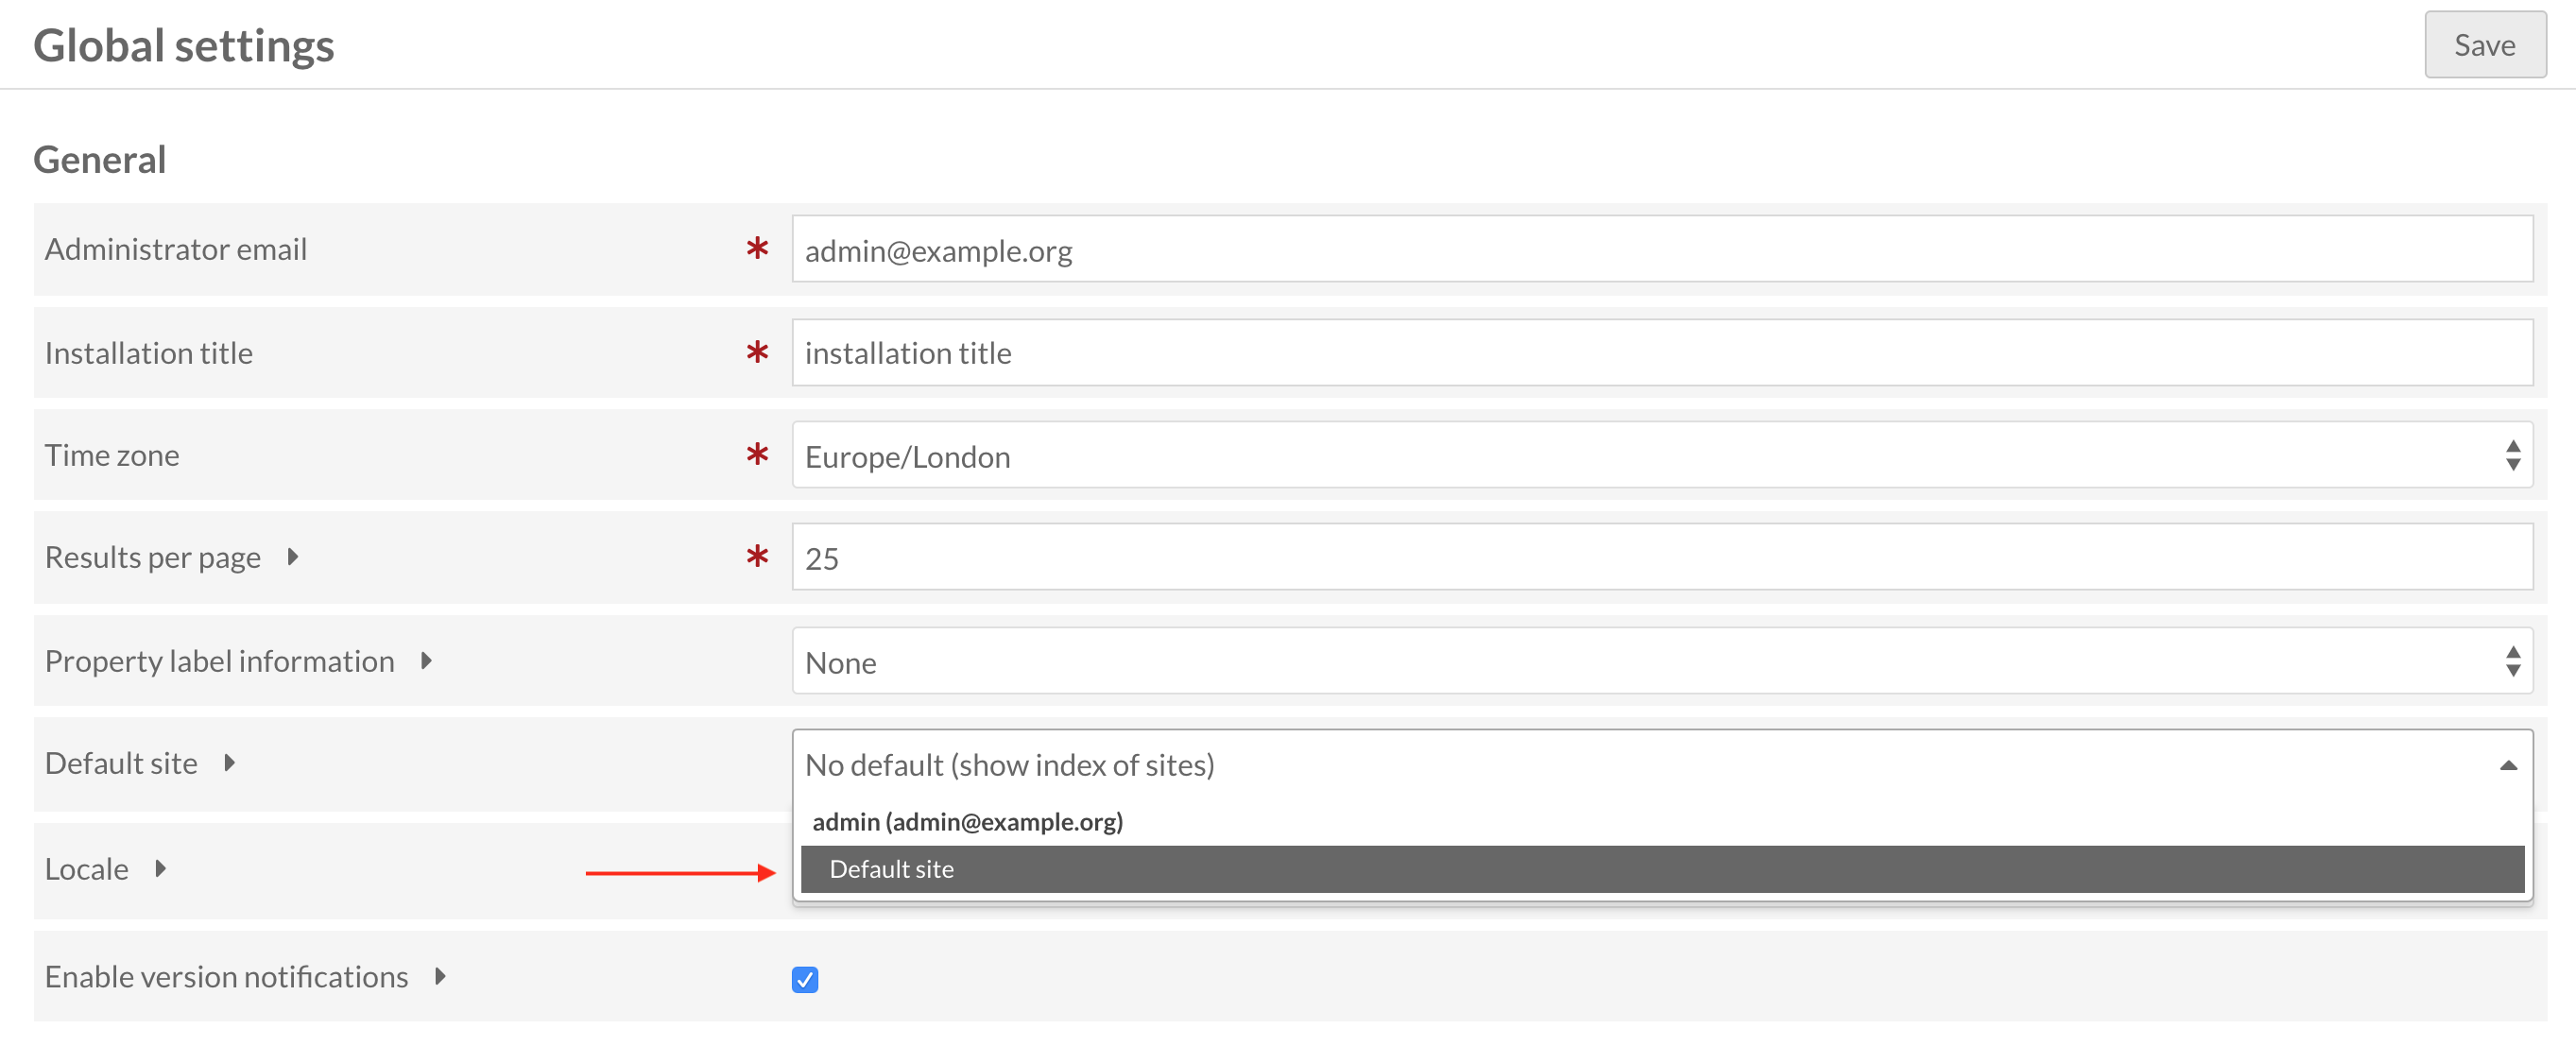
By default, when you go to the root of your domain you will se a choice of all the sites hosted on the platform. This is not always desired behaviour. To change this click on "Settings" at the bottom of the Admin UI menu and choose "Default site" option and select the site you want. This will redirect any requests to this site, where you can create a richer landing page for your platform.

Publishing your site
A gotcha in Omeka is the lack of publishing by default. In order to publish your website to the world you will have to change its visibility. To do this click on "Sites" and then your site. You will see an eye crossed out to indicate that this site is not yet public. Once you've clicked into your site, click "edit" and then click the "Eye" icon in the top right next to "View". It should now no longer be crossed out, and you can save the changes on the page. Now your site can be viewed by anonymous users and no longer requires users to be logged in. You can follow these same steps to make a site private, just ensure the visibility icon is crossed out before saving.
